How to Remove Google Account Verification Lock in Samsung Devices
Google account verification is a built-in security layer for your Android devices. If you buy a second-hand Samsung J7/S7/S8 and can't get in touch with the seller, or when you forget your Google account password, it will become a trouble to stop you access the Samsung device.
But not worry! In this article we will tell you three ways to bypass Google account Samsung.
- Way 1: [Best Tool] How to Bypass Google Account Samsung Less Than 5 Minutes
- Way 2: [Basic Method] How to Bypass Google Verification on Samsung without PC
- Way 3: [Most Complicated] How to Bypass Google Verification on Samsung Using App
Way 1: [Best Tool] How to Bypass Google Account Samsung Less Than 5 Minutes
When it comes to how to bypass Google verification on Samsung, the first method we would like to introdcue is a amazing tool - Tenorshare 4uKey for Android. This app can help FRP bypass Samsung with a few simple steps.


-
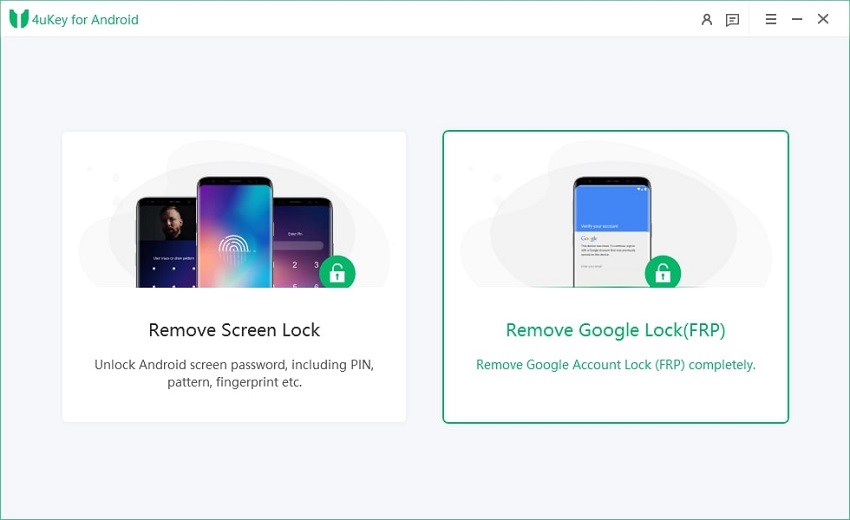
Download Tenroshare 4uKey for Android on computer, choose the feature "Remove Google Lock(FRP)" after connecting your Samsung phone.

-
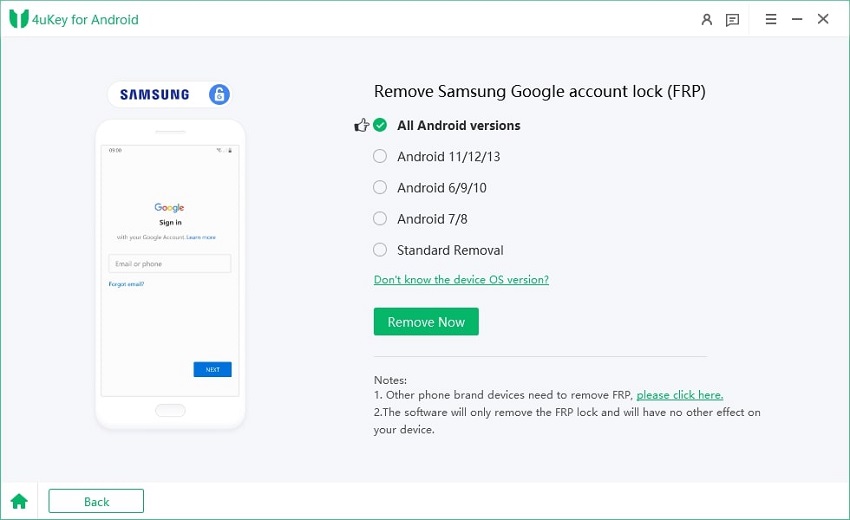
Next screen will show your some notes, and you also need to choose your Samsung device system version manually. Click "Send Notification" to move on.

-
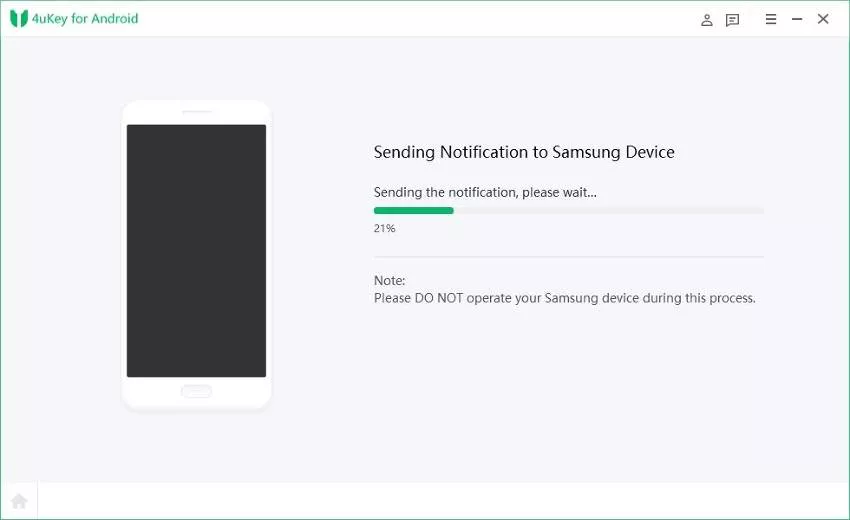
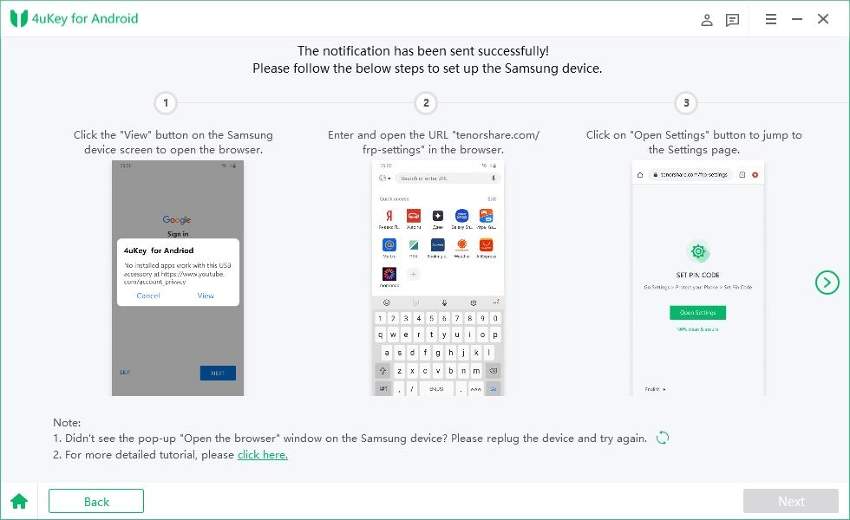
Next, Tenorshare 4uKey for Android will send a notification to your Samsung device.

-
Now, you need to follow the steps on interface to set your unlock pin code.

-
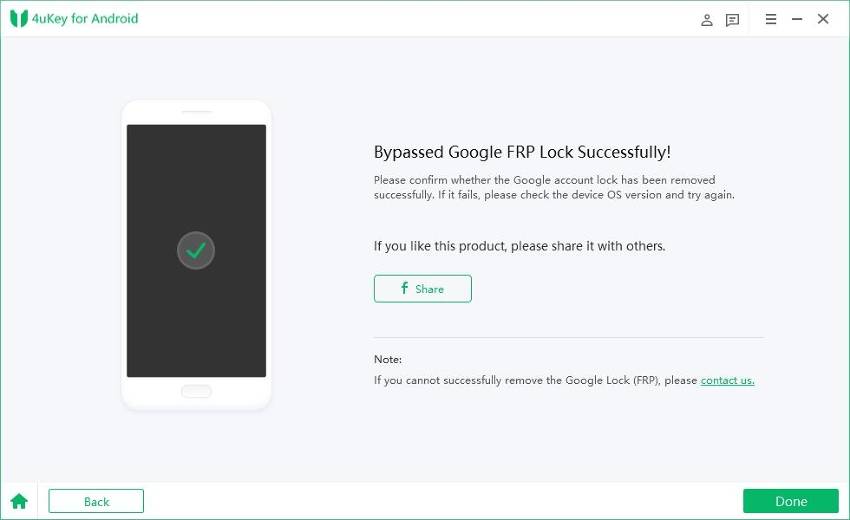
Once done, you will see "Bypass Google FRP Lock Successfully!". Then, reboot your device and use the new pin to access Samsung device.

That's how to achieve Samsung j3 bypass google account with computer. If you have any doubts please check the video guide below:


Way 2: [Basic Method] How to Bypass Google Verification on Samsung without PC
Sometimes you face Samsung Galaxy Note 5 bypass google account, and the next must be the most basic way for you to bypass Google Account Samsung. Basically, the procedure starts after you have successfully reset the mobile, and then you will follow a few steps to get access to the mobile again.
Here's how to bypass Google account Samsung after factory reset without PC:
- Simply, factory reset and restart the Samsung mobile .
- Then, select the language and connect it to the Wi-Fi network.
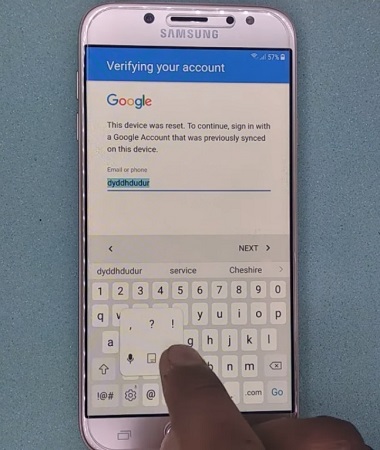
- Now, you will be asked for the credentials of your Google Account.
- The virtual keyboard will come up to the screen and you must tap and hold "@" to get the Settings menu.
- Now, choose Google Keyboard Settings.
- After that, you are going to tap on 3 dots at the top of the window; there may be more dots, depending on the version of Android you are using.
-
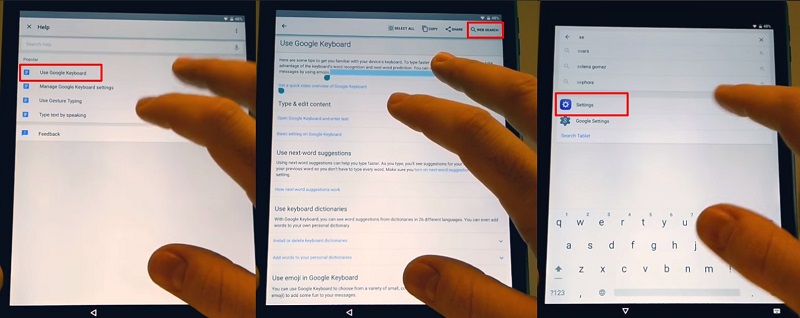
From the drop menu you must select "Help & Feedback".

Fig. bypass samsung google account step - In the "Help" section tap on "Using Google Keyboard" and then tap and hold to select any text on that page and then click "Websearch".
- A search bar will come up and you need to type "Settings" in there.
-
Scroll down the menu again to select "About Phone".

Fig. bypass google verification on samsung galaxy step - Then, enter the menu and find the Build Number. After finding it, tap on it 7 times, which will activate the Developer Options.
- Now, you need to go back to the previous menu and enter Developer Option that you just unlocked.
- There, you must enable "OEM Unlocking" and tap on "back" twice.
- Restart the device and connect to Wi-Fi again.
- This time you will not be asked for the Google Account detail, but you will be asked to add a new Google Account.
- Now, just simply add a new account and you will have complete access to your device.
This is how to bypass Google account on Samsung, and it won't work on other devices.
Way 3:[Most Complicated] How to Bypass Google Verification on Samsung Using App
You can also bypass Samsung Google account verification using specific app. And this is a very complicated and elaborate procedure, so you should read it very carefully. This procedure will definitely bypass Bypass Google acount on S21/S20/S10/S7/S8/J3.
Here is a detailed description showing you the little trick to bypass Google verify on Samsung:
- Reset your Samsung mobile and wait for the "Welcome" screen, choose the language and tap on "Start".
- Now, connect to the Wi-Fi network and you will be asked for the detail of your Google Account.
-
Type anything where you have to type the email ID, then tap and hold on it to select it and then go to "Keyboard Settings".

Fig. use app to bypass any samsung google account lock step 3 - In there, select "About Samsung Keyboard" and open the "Open Source License".
- Tap and hold on the agreement page and tap on the 3 dots when the pop-up appears.
- Then, tap on "Web Search". Unfortunately, your request will be declined.
- Now, go back to the beginning and press the Home button 3 times.
-
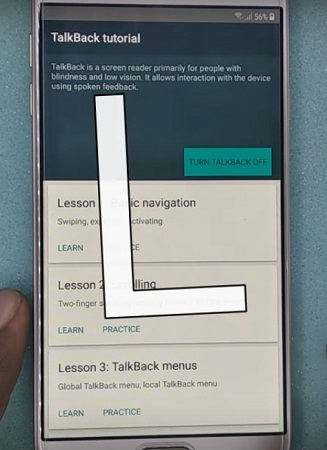
Then, a Talkback tutorial menu will open, you need to spell "L" on the touchscreen.

Fig. use app to samsung google account bypass step 9 - Now, a new Global Context Menu will come up and from there, you need to select the "Talkback Settings".
-
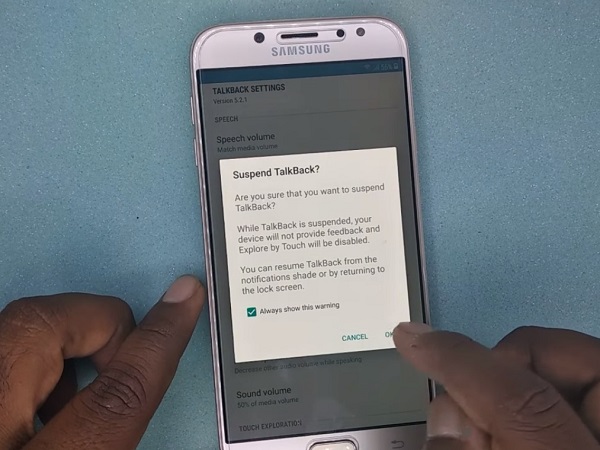
When you are in the Talkback Settings, press both of the Volume button together, then a new dialog box will open, named "Suspend Talkback".

Fig. use app to samsung google account remove step 11 - Click "OK" on the box and go back to the Talkback Settings and tap on "Help & Feedback".
-
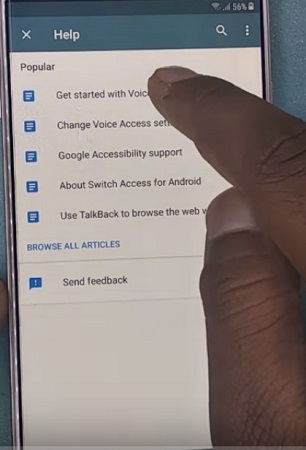
Inside that menu, tap and hold on "Get Started with Voice Access".

Fig. use app to samsung google account bypass step 13 - A page will come up containing a video, regarding Voice Access.
- On that video, you must tap on "YouTube" and you will be immediately redirected there.
- From YouTube, go to the Account and tap on "Terms & Privacy policy".
- Then, a dialog box with 3 options will appear, you need to tap on "Cancel", immediately you will be redirected to the "Terms of Service" page.
- Now, in the search bar above, type "Lavileztechservice" on Google.
- Go to the download page of "Lavileztechservice" and block the ads.
-
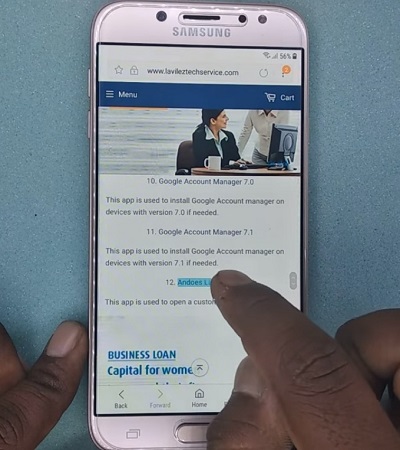
Then, scroll down and select "Andoes Launcher".

Fig. use app to samsung google account bypass step 20 - Now, download "anddoes.launcher.apk".
- It won't download, go to the search bar and type "youthsgalaxy.com".
- Now, try downloading this one.
- Now, go to the "Bookmarks" and then go to "History".
- Under "History", tap on "Download History".
- Inside "Download History" you will find you will find the setup files, tap on "Andoes launcher".
- When you tap on the launcher, a dialog box will open, tap on Settings.
- Then, tap on "Unknown Sources", after that another dialog box will open, uncheck the selected option and tap "OK".
- Now, install the launcher.
- After it is installed, go to the Settings of your device and tap on "Lock Screen & Security".
- In there, tap on "Other Security Settings".
-
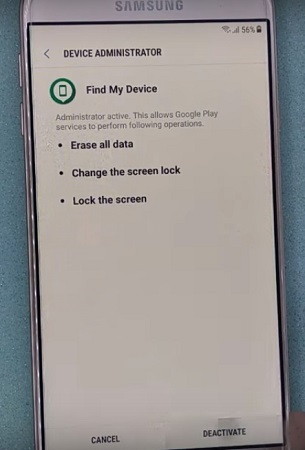
Go to "Device Administrators" and uncheck "Find My device".

Fig. use app to bypass samsung google account step 32 - After that, go back to the Settings and tap on "Apps" and make sure that the System Apps are visible.
- Now, tap on Google Account manager and disable it.
- Then, disable Google Play Services.
- Now, go back to download history and tap on "Technocare" to install it.
- After the app is installed, tap on "Done" and go to Settings again.
- Go to "Clouds and Accounts" and tap on "Accounts"
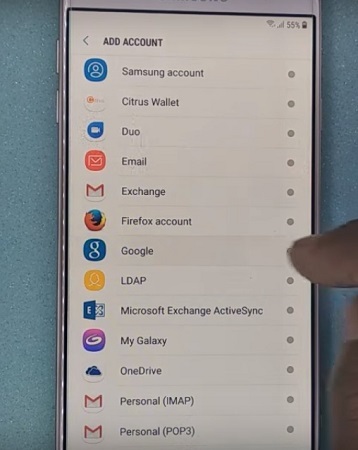
- Now, you need to tap on "Add Account".
-
A list will be opened but you need to select Google from that list.

Fig. use app to bypass google account samsung step 40 - The screen will show that "Couldn't Sign it", tap "Next".
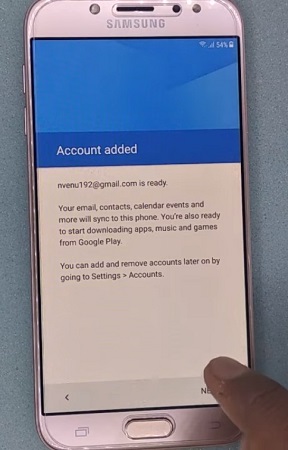
- Go back and do it again, but this time you will succeed.
- Type your new Gmail account and wait for the device to verify the details.
- Now, go back to settings and tap on Other Security Settings.
- There, tap on "Device Administrators" and activate "Android Device Manager".
- Now, go to Apps and enable "Google Play Services".
- Restart the device.
- In the "Welcome" screen tap on "Start" and in the next screen check "Agree to All".
-
Now, the mobile will start checking the Network.

Fig. use app to bypass google account samsung step 49 - Tap on "Don't Restore" and then proceed without even selecting any security protocol.
- Finish the wizard.
- Again, go to the Settings and go into "About Phone".
- Then, "Software Information" and inside that you will find the "Build Number",tap on it quite a few times.
- Now, go back to "Developer Options" and tap "Agree" on the dialog box.
- Activate "USB Debugging" and then activate "OEM Unlock".
- Then, go back to 'About Phone" and tap "Reset" and inside that tap on "Factory Data Reset".
-
Finally, tap on "Delete All" and the procedure will begin.

Fig. use app to bypass google account samsung step 57 - After, it starts again, tap on "Start" then finish the Wizard.
- And you will see that the device has verified the Google Account and you are able to use the Samsung device now.
This is a very cumbersome procedure, but it only works for Android devices manufactured by Samsung.
Conclusion
You will have to face something like, Galaxy S8 bypass verify, or Google account verification every time you make a factory reset. No matter when you ask "How to bypass Google verification on samsung galaxy Tab A or "Samsung J3 Google bypass", you can use Tenorshare 4uKey for Android or any one of the methods above to bypass Google Account Samsung. Also, if you have a locked Samsung galaxy phone, you can use the service to bypass Samsung lock screen/password/pattern/pin. It is a professional Android screen unlocker tool and can bypass any type of passwords with ease. Highly recommended!
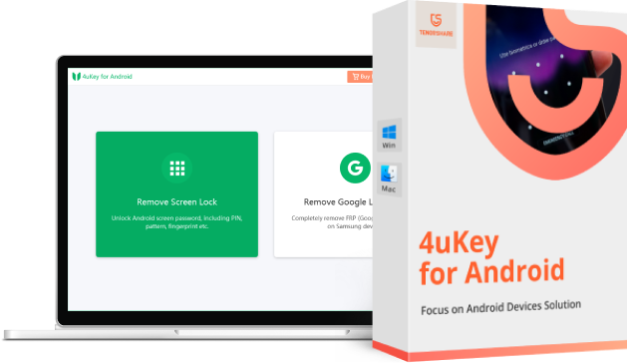
Remove Android Screen Lock & Bypass Samsung FRP Lock
- Bypass Google account verification on Samsung devices (Win & Mac)
- Remove Android password, pattern, PIN, and fingerprint lock just one click away
- Support Android lock screen removal Win & Mac
Free Trial Free Trial
How to Remove Google Account Verification Lock in Samsung Devices
Source: https://www.tenorshare.com/samsung/bypass-google-account-samsung.html


0 Response to "How to Remove Google Account Verification Lock in Samsung Devices"
Post a Comment